moectf2023-AI复现


AI入门指北

题目描述:

1
機器學習の煉金術士dayo

附件

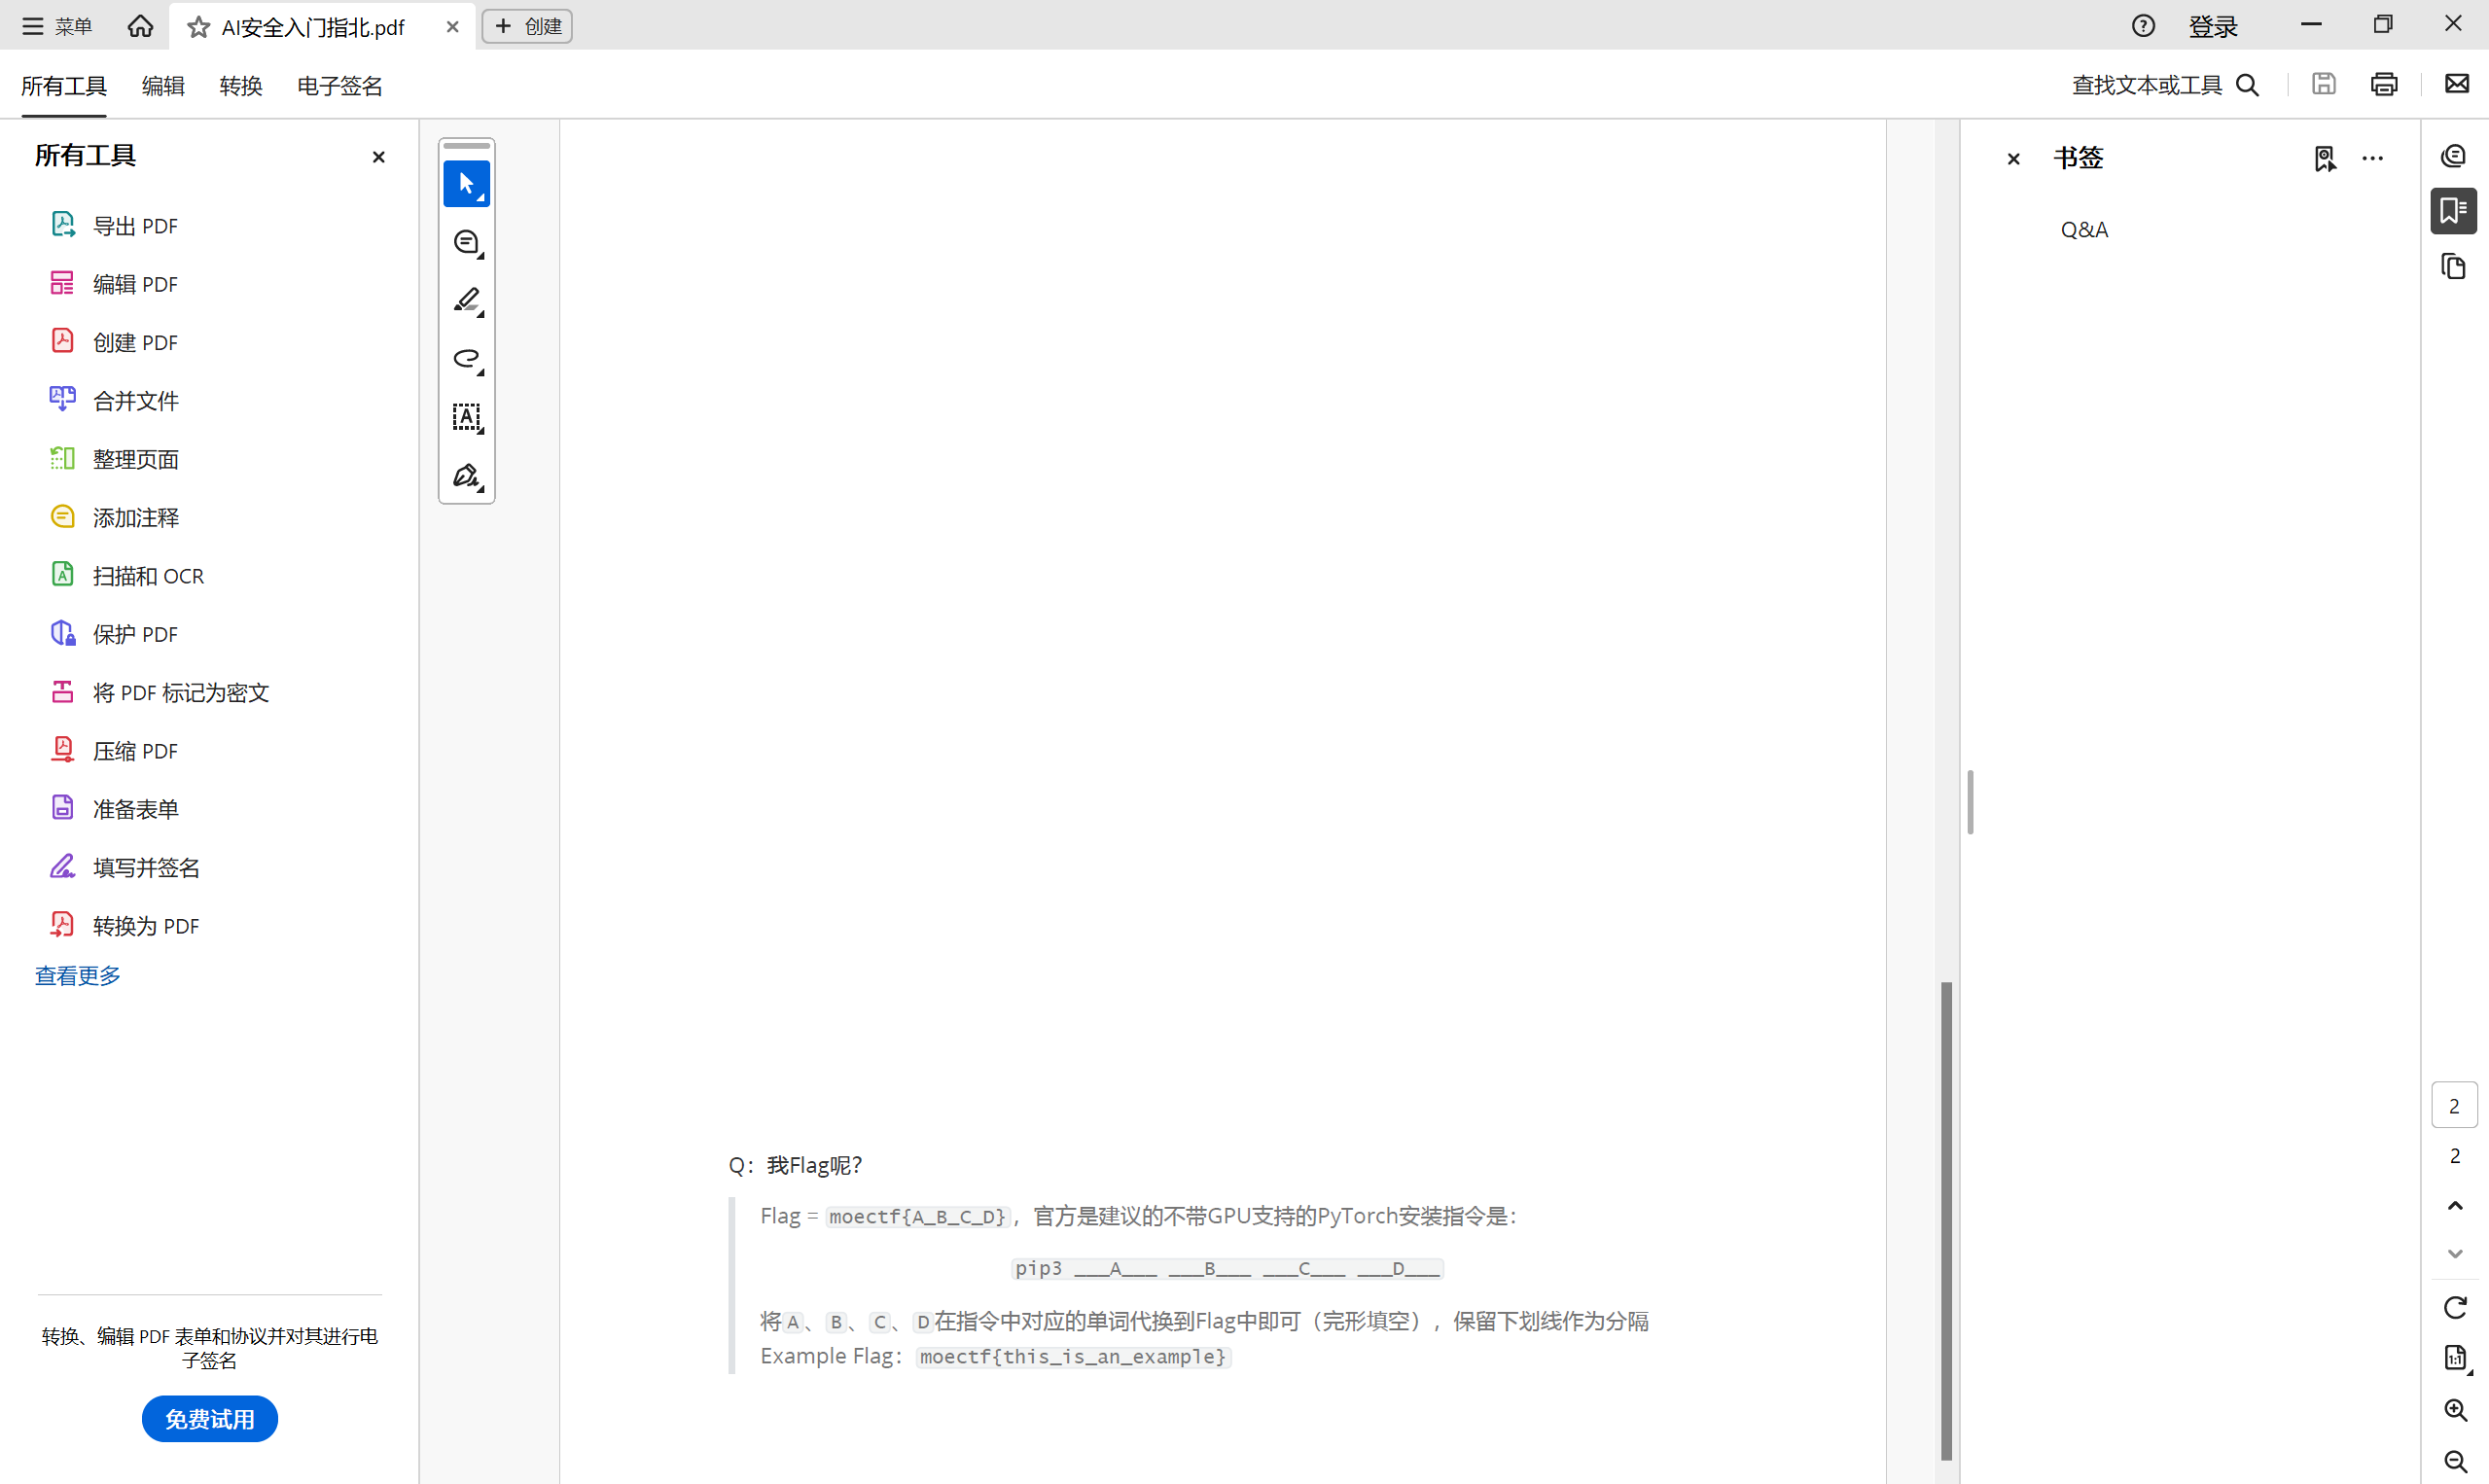
安装PyTorch

PyTorch安装_pip安装pytorch-CSDN博客

1
pip3 install torch torchvision torchaudio

最后flag为

1
moectf{install_torch_torchvision_torchaudio}

A very happy MLP

题目描述:

1
2
3
4
5
6
7
Without training, you can make this Multilayer Perceptron happy :)

Just like solving an equation,
f(x+flag)=y
Knowing x, y and f(), every one can get the flag and please the MLP.
Be kind to every wild MLP.
Amen.

附件

model.py

1
2
3
4
5
6
7
8
9
10
11
12
13
14
15
16
17
18
19
20
21
22
23
24
25
26
27
28
29
30
import torch


class Net(torch.nn.Module):
def __init__(self):
torch.nn.Module.__init__(self)
self.fc1 = torch.nn.Linear(30, 20)
self.fc2 = torch.nn.Linear(20, 10)
self.fc3 = torch.nn.Linear(10, 3)
self.scale = 40.0

def forward(self, x):
x = self.fc1(x)
x = torch.sigmoid(x)
# The following line of code enlarges the vector space
x = x * self.scale - self.scale / 2
x = self.fc2(x)
x = torch.sigmoid(x)
x = x * self.scale - self.scale / 2
x = self.fc3(x)
return x


# Hints:

# > Learn all the functions in the model, what are their inputs and outputs, what are their formulas?

# > Once you know the formulas, you can easily calculate the flag by code without training.

run.py

1
2
3
4
5
6
7
8
9
10
11
12
13
14
15
16
17
18
19
20
21
22
23
24
25
26
27
28
29
30
31
32
33
34
35
36
37
38
39
40
41
42
43
44
45
46
47
import numpy as np
import torch
from model import Net


def chr2float(c):
return ord(c) / 255. * 2. - 1


def float2chr(f):
return f


def verify(flag_path):

def verify_flag(flag_tensor):
checkpoint = torch.load('_Checkpoint.pth')
net = Net()
net.load_state_dict(checkpoint['model'])
base_input = checkpoint['input']
output = net(base_input + flag_tensor)
return torch.equal(torch.round(output.detach(), decimals=5), torch.tensor([2., 3., 3.]))

def show_flag(flag_tensor):
flag = ''
for f in np.array(flag_tensor).ravel():
flag += float2chr(f)
print('moectf{' + flag + '}')

try:
flag_tensor = torch.load(flag_path).detach()
except:
print('Invalid flag path.')
return
if verify_flag(flag_tensor):
print('You made this little MLP happy, here\'s his reward:')
show_flag(flag_tensor)
else:
print('Sad :(')


if __name__ == '__main__':
verify('_Flag.pth')

加载模型

全连接神经网络前向传播运算

输出维度为3

exp:

1
2
3
4
5
6
7
8
9
10
11
12
13
14
15
16
17
18
19
20
21
22
23
24
25
26
27
28
29
30
31
32
33
34
35
36
37
38
39
40
41
42
43
44
45
46
47
48
49
50
51
52
53
54
55
56
57
58
59
60
61
62
63
64
65
66
67
68
69
70
71
72
73
74
75
76
77
78
79
80
81
82
83
84
85
86
87
88
89
90
91
92
93
94
95
96
97
98
99
100
101
102
103
104
105
106
107
108
109
110
111
112
113
114
115
116
117
118
119
120
121
122
123
124
125
126
127
128
129
130
131
132
133
134
135
136
137
138
139
140
141
142
143
144
145
146
147
148
import torch
import numpy as np
from model import Net

def inv_fc(y, weight, bias, epsilon=1e-8):
"""
全连接层的逆运算
使用伪逆矩阵解决非方阵问题
添加epsilon防止数值不稳定
"""
# 添加微小值防止奇异矩阵问题
weight_pinv = torch.linalg.pinv(weight, rtol=epsilon)
return torch.matmul(y - bias, weight_pinv.T)

def inv_sigmoid(y, epsilon=1e-8):
"""
Sigmoid激活函数的逆运算(logit函数)
添加epsilon防止除零错误和数值溢出
"""
# 限制在(0,1)范围内防止NaN
y_clamped = torch.clamp(y, epsilon, 1 - epsilon)
return torch.log(y_clamped / (1 - y_clamped))

def float2chr(f):
"""将[-1,1]范围内的浮点数转换为字符"""
# 确保值在有效范围内
normalized = np.clip((f + 1) / 2.0, 0, 1)
# 四舍五入到最接近的整数
int_val = int(np.round(normalized * 255))
# 确保在ASCII范围内
return chr(max(32, min(126, int_val)))

def calculate_flag(checkpoint_path='_Checkpoint.pth'):
"""
通过模型逆运算计算flag张量
返回flag_tensor和验证结果
"""
try:
# 加载模型和基础输入
checkpoint = torch.load(checkpoint_path)
net = Net()
net.load_state_dict(checkpoint['model'])
base_input = checkpoint['input']

# 目标输出
intended_out = torch.tensor([2., 3., 3.], dtype=torch.float32)

# 使用命名变量提高可读性
half_scale = net.scale / 2.0

# ===== 反向传播计算 =====
# 1. 逆运算第三层
fc3_input = inv_fc(intended_out, net.fc3.weight, net.fc3.bias)

# 2. 逆运算第二层激活和缩放
# 先反转缩放操作: x = (y + scale/2) / scale
scaled_fc2_output = (fc3_input + half_scale) / net.scale
# 然后反转sigmoid激活
fc2_output = inv_sigmoid(scaled_fc2_output)

# 3. 逆运算第二层
fc2_input = inv_fc(fc2_output, net.fc2.weight, net.fc2.bias)

# 4. 逆运算第一层激活和缩放
scaled_fc1_output = (fc2_input + half_scale) / net.scale
fc1_output = inv_sigmoid(scaled_fc1_output)

# 5. 逆运算第一层
fc1_input = inv_fc(fc1_output, net.fc1.weight, net.fc1.bias)

# 计算flag张量
flag_tensor = fc1_input - base_input

# 验证计算结果
actual_output = net(base_input + flag_tensor)
is_valid = torch.allclose(
actual_output,
intended_out,
atol=1e-5,
rtol=1e-5
)

return flag_tensor, is_valid

except Exception as e:
print(f"计算flag时发生错误: {e}")
return None, False

def verify_and_show_flag(flag_tensor, checkpoint_path='_Checkpoint.pth'):
"""验证并显示flag"""
try:
checkpoint = torch.load(checkpoint_path)
net = Net()
net.load_state_dict(checkpoint['model'])
base_input = checkpoint['input']

# 计算输出
output = net(base_input + flag_tensor)

# 使用容差比较而非精确相等
target = torch.tensor([2., 3., 3.])
is_valid = torch.allclose(
output.detach(),
target,
atol=1e-5,
rtol=1e-5
)

if is_valid:
# 转换为字符串
flag_str = ''.join(float2chr(f) for f in flag_tensor.detach().numpy().ravel())
print('=' * 50)
print('You made this little MLP happy, here\'s his reward:')
print(f'moectf{{{flag_str}}}')
print('=' * 50)
return True
else:
print("验证失败: 输出不匹配")
print(f"预期输出: {target.tolist()}")
print(f"实际输出: {output.detach().tolist()}")
return False

except Exception as e:
print(f"验证过程中发生错误: {e}")
return False

def main():
"""主函数:计算、验证并显示flag"""
# 计算flag张量
flag_tensor, is_calculated = calculate_flag()

if flag_tensor is None or not is_calculated:
print("无法计算有效的flag张量")
return

# 验证并显示flag
if not verify_and_show_flag(flag_tensor):
print("Flag验证失败")

# 保存flag张量(可选)
try:
torch.save(flag_tensor, '_FlagSolution.pth')
print("Flag张量已保存到 '_FlagSolution.pth'")
except Exception as e:
print(f"保存flag张量失败: {e}")

if __name__ == '__main__':
main()

运行得到

最后flag为

1
moectf{Ez_f0rW4Rd_pR0pAG@7lOn!_ym34v1}

Classification

题目描述:

1
2
3
4
5
We saved some images from IMAGE NET, but there are way more to be rescued...

They seems injured, but still recognizable.

Anyway, find out who they are and send them home for now. Hurry!

附件

给了个py文件,以及img文件夹里面很多图片还有个npy文件

data_generation.py

1
2
3
4
5
6
7
8
9
10
11
12
13
14
15
16
17
18
19
20
21
22
23
24
25
26
27
28
29
30
31
32
33
34
35
36
37
38
39
40
41
42
43
44
45
46
47
48
49
50
51
52
from secret import flag
from attachments import salt

from torchvision import transforms
from PIL import Image


def get_img_by_label(label) -> Image.Image:
pass


def init_model():
pass


labels = []
for i in range(len(flag)):
labels.append((ord(flag[i]) + salt[i])%1000)

model = init_model()

normalize = transforms.Normalize(mean=[0.485, 0.456, 0.406], std=[0.229, 0.224, 0.225])
transform = transforms.Compose([
transforms.Resize(256),
transforms.CenterCrop(224),
transforms.ToTensor(),
normalize,
])

for i, label in enumerate(labels):
img = get_img_by_label(label)
img.save('imgs/' + str(i) + '.png')
img_tensor = transform(img).unsqueeze(0)
assert model(img_tensor).argmax().item() == label

print('Data generation finished.')


# Hints:

# > You don't need to train your own model.

# > Nearly half of the flag content is meaningful, no need for flag submission if your flag is meaningless.

# > Please wrap your flag with moectf{} manually.

# > If you're not getting the correct flag, try to use a more accurate model.
# In my testing, Bottleneck3463 worked but the inferior one didn't.
# Or, maybe you should think about converting numeric labels to human-readable text labels,
# and check if your model is working properly.

DNN的使用

使用Resnet对图片序列进行分类,获得的label就是flag的ord

exp:

1
2
3
4
5
6
7
8
9
10
11
12
13
14
15
16
17
18
19
20
21
22
23
24
25
26
27
28
29
import torchvision
from torchvision import transforms
import torch
from PIL import Image
import numpy as np

model = torchvision.models.resnet50(pretrained=True)
model.eval()

normalize = transforms.Normalize(mean=[0.485, 0.456, 0.406], std=[0.229, 0.224, 0.225])
transform = transforms.Compose([
transforms.Resize(256),
transforms.CenterCrop(224),
transforms.ToTensor(),
normalize,
])

preds = []
for i in range(60):
img = Image.open('D:\\tmp\\classification\\_Attachment\\imgs\\' + str(i) + '.png')
pred = model(transform(img).unsqueeze(0)).detach()[0]
pred = torch.argmax(pred).item()
preds.append(pred)

flag = ''
salt = np.load('D:\\tmp\\classification\\_Attachment\\salt.npy')
for i in range(len(preds)):
flag += chr((preds[i]-salt[i])%1000)
print(flag)

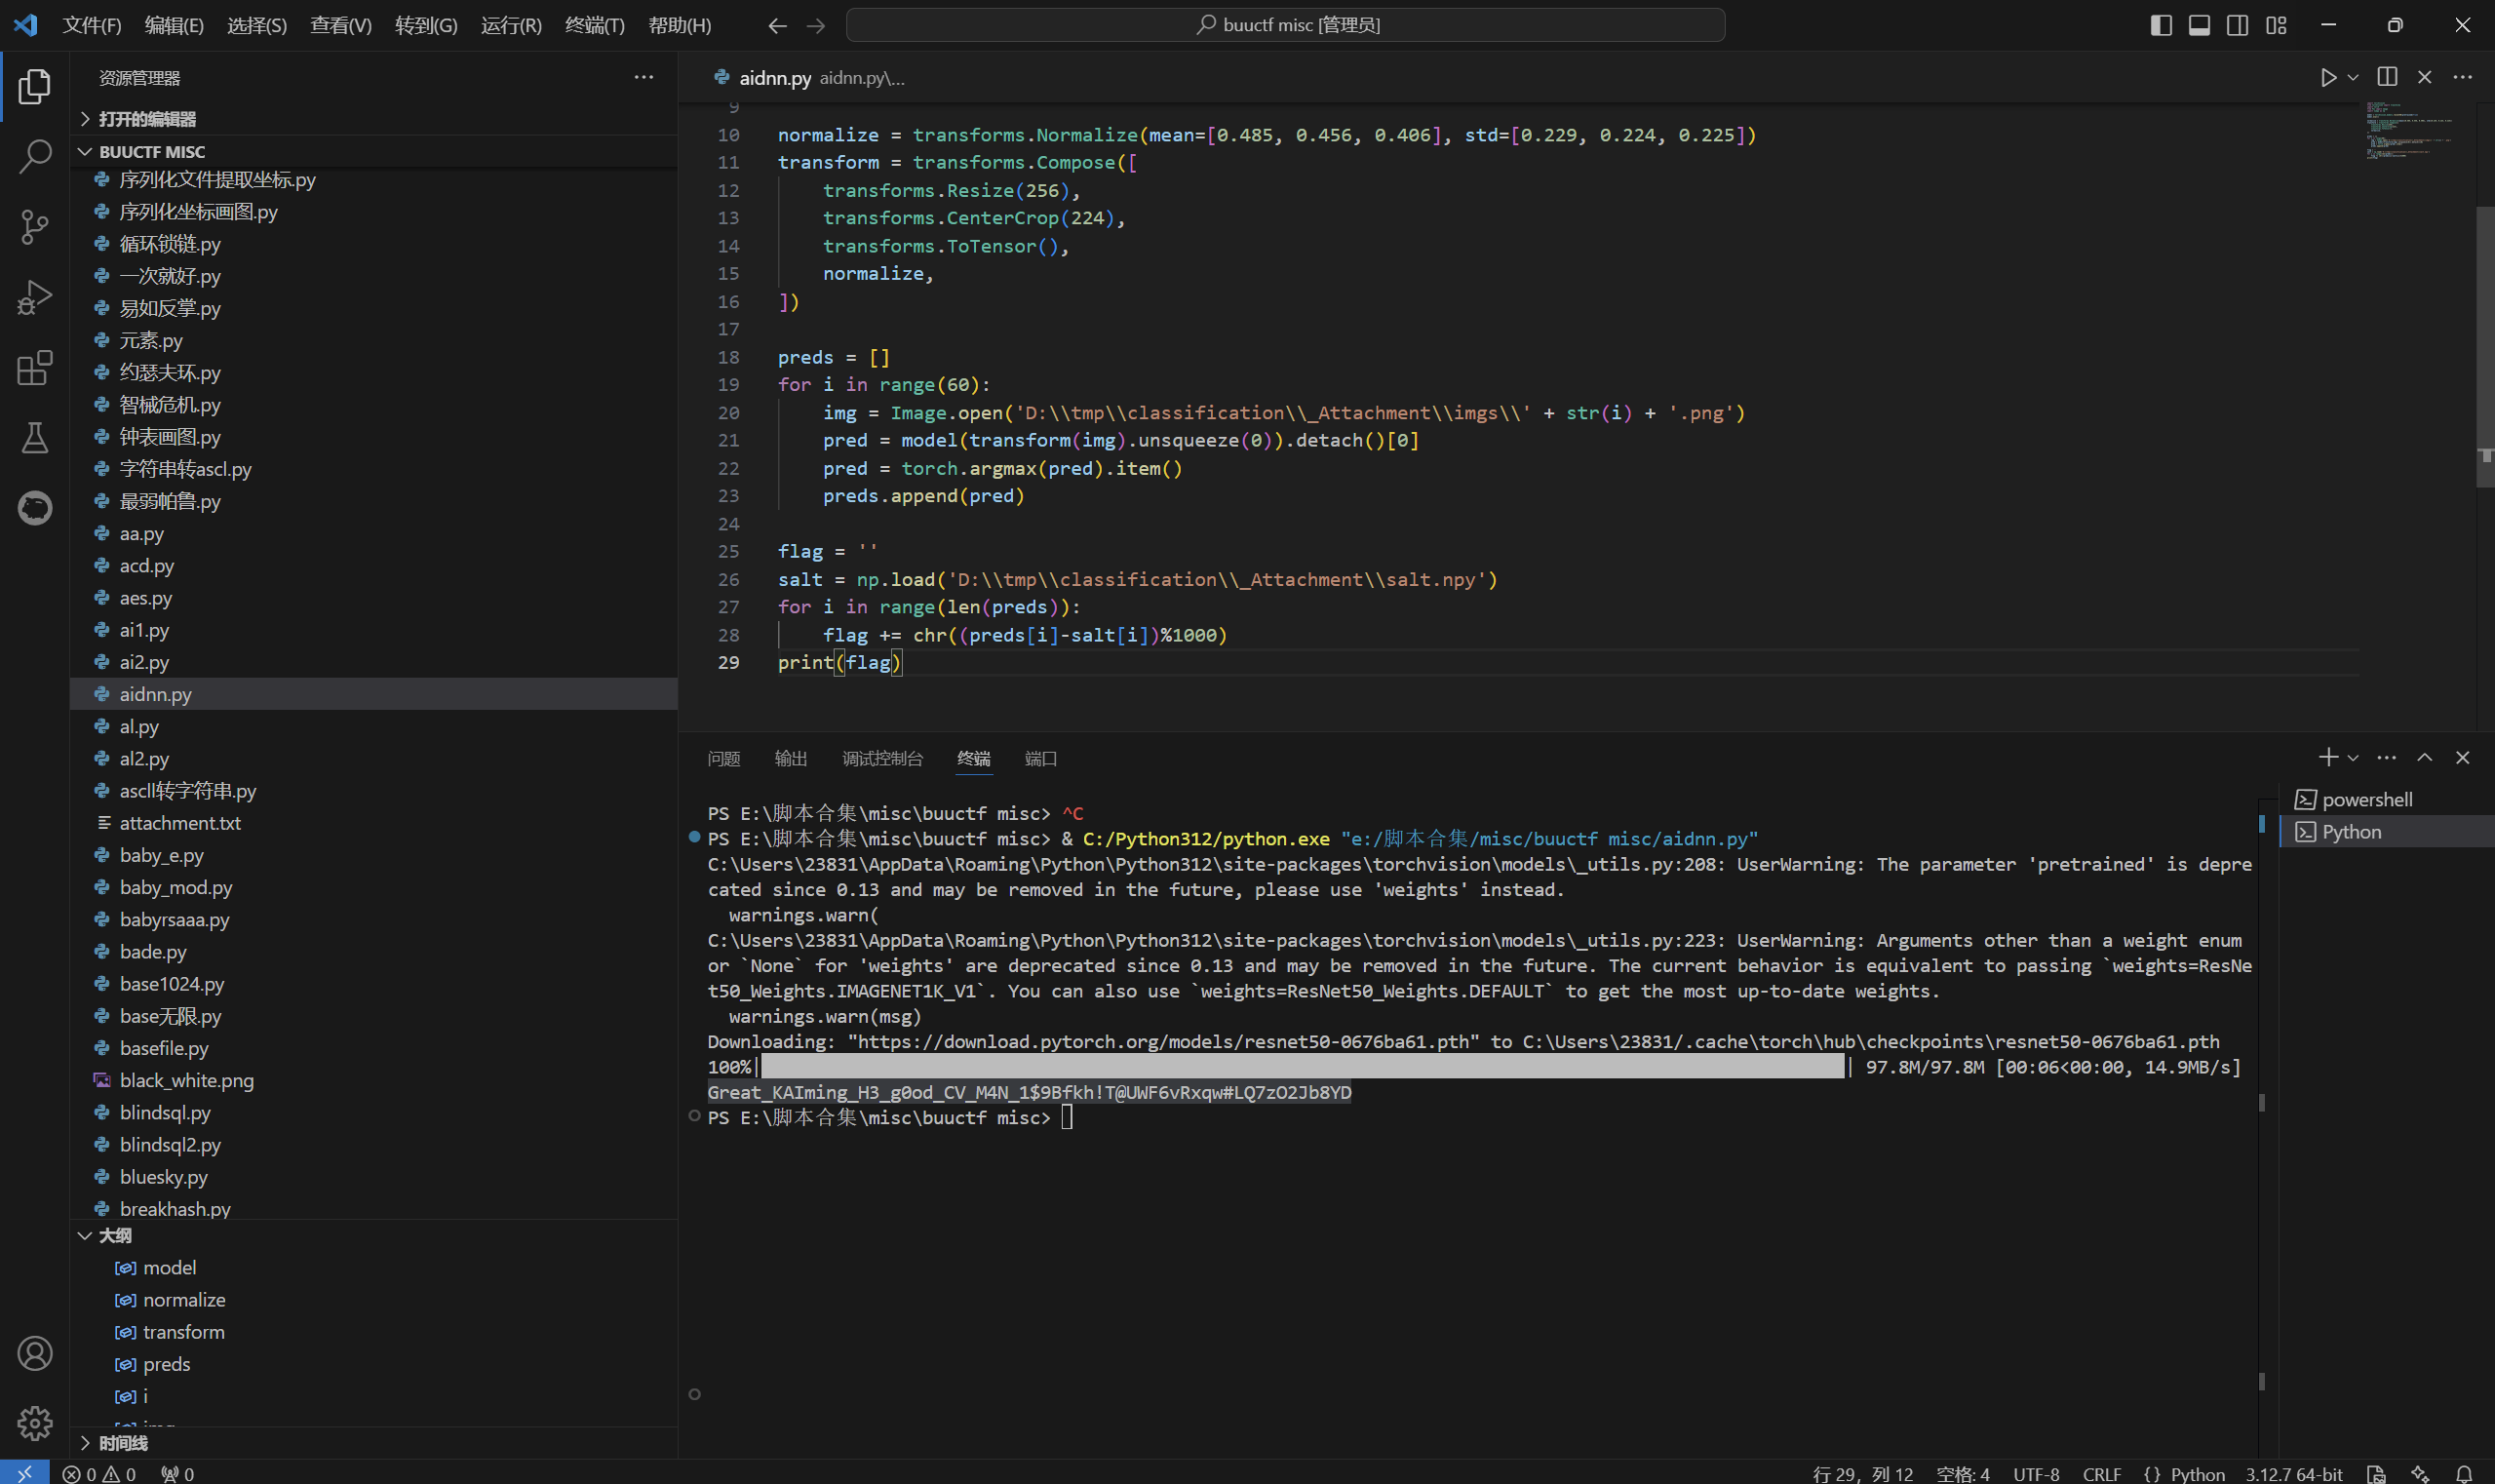
运行得到

最后flag为

1
moectf{Great_KAIming_H3_g0od_CV_M4N_1$9Bfkh!T@UWF6vRxqw#LQ7zO2Jb8YD}

EZ Conv

题目描述:

1
EZ Conv

给了个npys文件夹里面有三个npy文件,还有个GIF文件以及run.py文件

run.py

1
2
3
4
5
6
7
8
9
10
11
12
13
14
15
16
from npys import w, b, inp

def conv(x, w, b):
return None

def get_25x25_QR_code(x):
return None

get_25x25_QR_code(conv(inp, w, b))

# Hints:
# > What is convolution?
# > What is convolutional layer in CNN?
# > What is channel?
# > How to calculate the output of a convolutional layer?
# > Example.gif is only for tutorial and demonstration, no hidden information contained.

卷积核

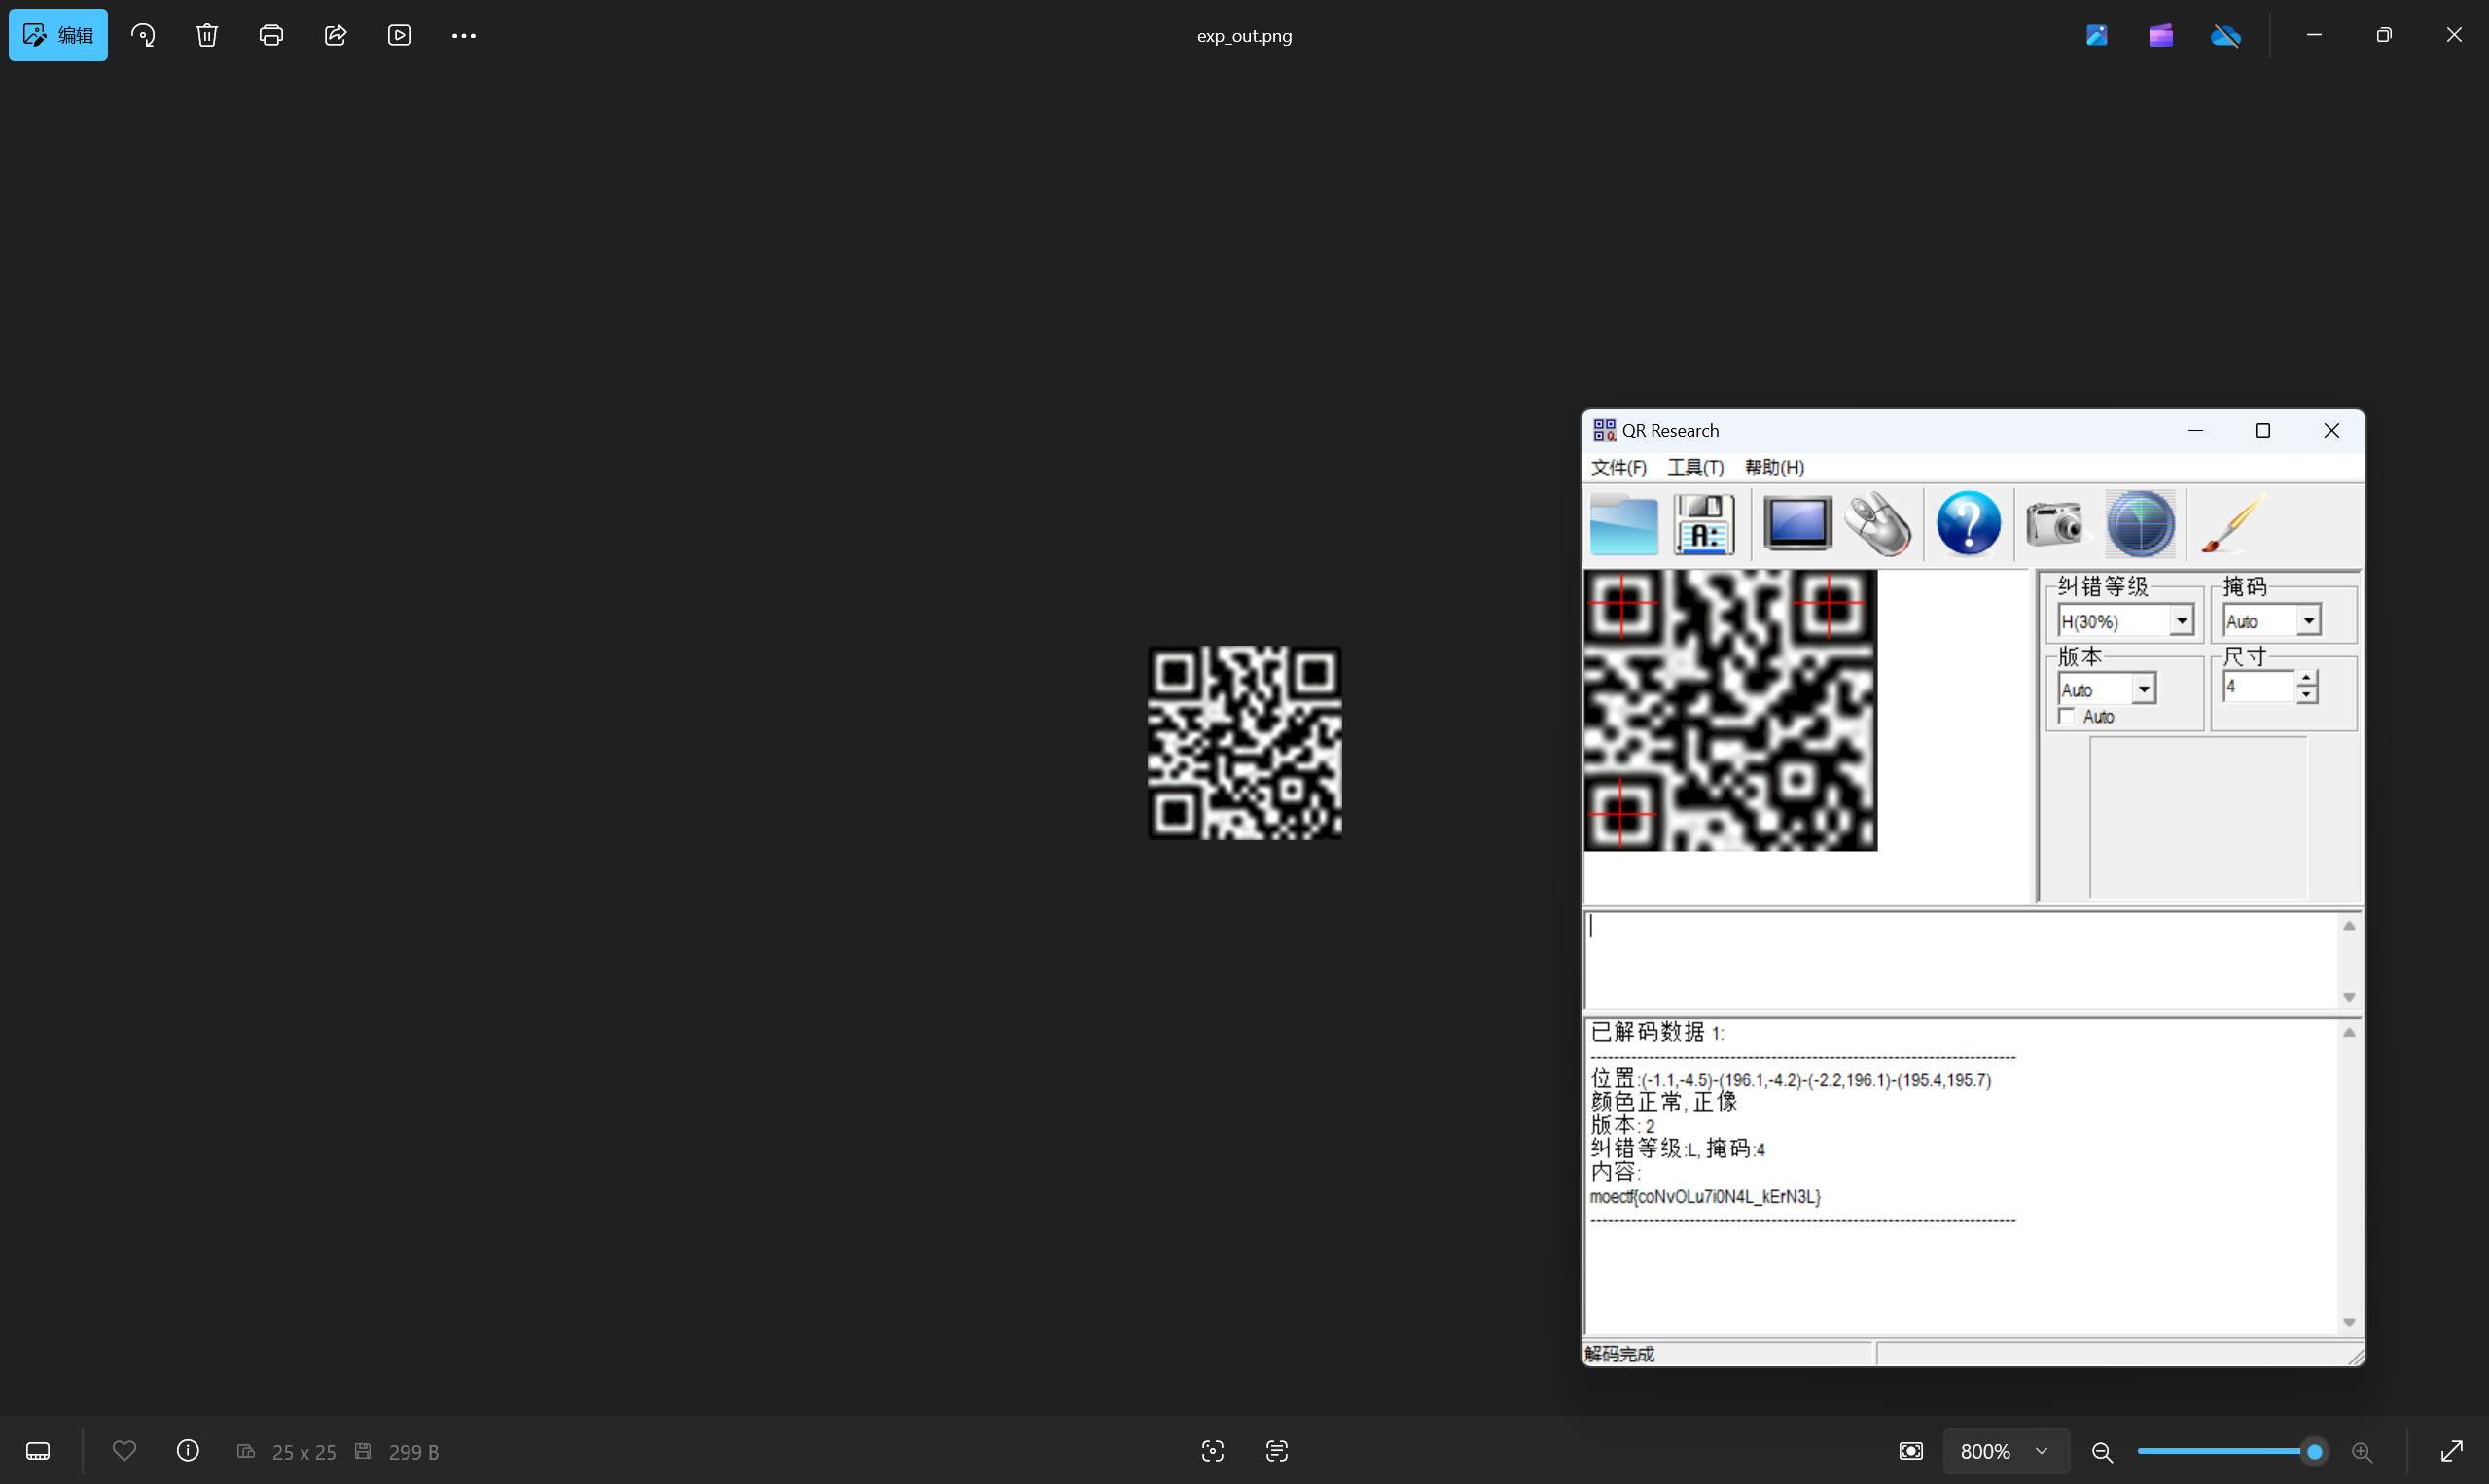
把给出input通过conv获得二维码,扫码获得flag

exp:

1
2
3
4
5
6
7
8
9
10
11
12
13
14
15
16
17
18
19
20
21
22
23
24
import numpy as np
from PIL import Image

inp = np.load('D:\\tmp\\EZ_Conv\\_Attachments\\npys\\inp.npy')
w = np.load('D:\\tmp\\EZ_Conv\\_Attachments\\npys\\w.npy')
b = np.load('D:\\tmp\\EZ_Conv\\_Attachments\\npys\\b.npy')

out = np.zeros((25, 5, 5))
for i in range(25):
for j in range(5):
for k in range(5):
out[i, j, k] = np.sum(inp[0, j:j+5, k:k+5] * w[i]) + b[i]

out = np.array(out).reshape((25,25))

print(out)

qr_len = 25
im=Image.new("RGB",(qr_len,qr_len))
for i in range(qr_len):
for j in range(qr_len):
if out[j][i] > 0:
im.putpixel((j,i),(225,225,225))
im.save("D:\\tmp\\EZ_Conv\\_Attachments\\exp_out.png")

运行得到二维码

扫描二维码得到flag

最后flag为

1
moectf{coNvOLu7i0N4L_kErN3L}

EZ MLP

题目描述:

1
My Little Pony (bushi)

附件

给了个npys文件夹里面有七个npy文件,还有个JPG文件以及run.py文件

run.py

1
2
3
4
5
6
7
8
9
10
11
12
13
14
15
16
17
18
19
20
21
22
23
24
25
26
27
28
29
30
31
32
33
import numpy as np

def fc(x, weight, bias):
return np.matmul(x, weight) + bias

def forward(x):
z1 = fc(x, w1, b1)
z2 = fc(z1, w2, b2)
y = fc(z2, w3, b3)
return y

w1 = np.load('npys/w1.npy')
b1 = np.load('npys/b1.npy')
w2 = np.load('npys/w2.npy')
b2 = np.load('npys/b2.npy')
w3 = np.load('npys/w3.npy')
b3 = np.load('npys/b3.npy')

float2chr = lambda f: chr(int(np.round((f + 1) * 255 / 2)))

inputs = np.load('npys/inputs.npy')
flag = ''
for i in range(len(inputs)):
y = forward(inputs[i])
c0 = float2chr(y[0, 0])
c1 = float2chr(y[1, 0])
flag += c0 + c1
print('moectf{' + flag + '}')

# Hints:
# > Fix the bug in the code to get the flag, only one line of code needs to be changed.
# > Understand the code and the figure(Example.jpg) before flag submission.
# > Example.jpg is only for tutorial and demonstration, no hidden information contained.

全连接层

把脚本中矩阵乘法处的Bug修复即可获得flag

line:4维度匹配错误,交换位置:

1
return np.matmul(weight, x) + bias

exp:

1
2
3
4
5
6
7
8
9
10
11
12
13
14
15
16
17
18
19
20
21
22
23
24
25
26
27
28
import numpy as np

def fc(x, weight, bias):
return np.matmul(weight, x) + bias

def forward(x):
z1 = fc(x, w1, b1)
z2 = fc(z1, w2, b2)
y = fc(z2, w3, b3)
return y

w1 = np.load('D:\\tmp\\EZ_MLP\\_Attachments\\npys\\w1.npy')
b1 = np.load('D:\\tmp\\EZ_MLP\\_Attachments\\npys\\b1.npy')
w2 = np.load('D:\\tmp\\EZ_MLP\\_Attachments\\npys\\w2.npy')
b2 = np.load('D:\\tmp\\EZ_MLP\\_Attachments\\npys\\b2.npy')
w3 = np.load('D:\\tmp\\EZ_MLP\\_Attachments\\npys\\w3.npy')
b3 = np.load('D:\\tmp\\EZ_MLP\\_Attachments\\npys\\b3.npy')

float2chr = lambda f: chr(int(np.round((f + 1) * 255 / 2)))

inputs = np.load('D:\\tmp\\EZ_MLP\\_Attachments\\npys\\inputs.npy')
flag = ''
for i in range(len(inputs)):
y = forward(inputs[i])
c0 = float2chr(y[0, 0])
c1 = float2chr(y[1, 0])
flag += c0 + c1
print('moectf{' + flag + '}')

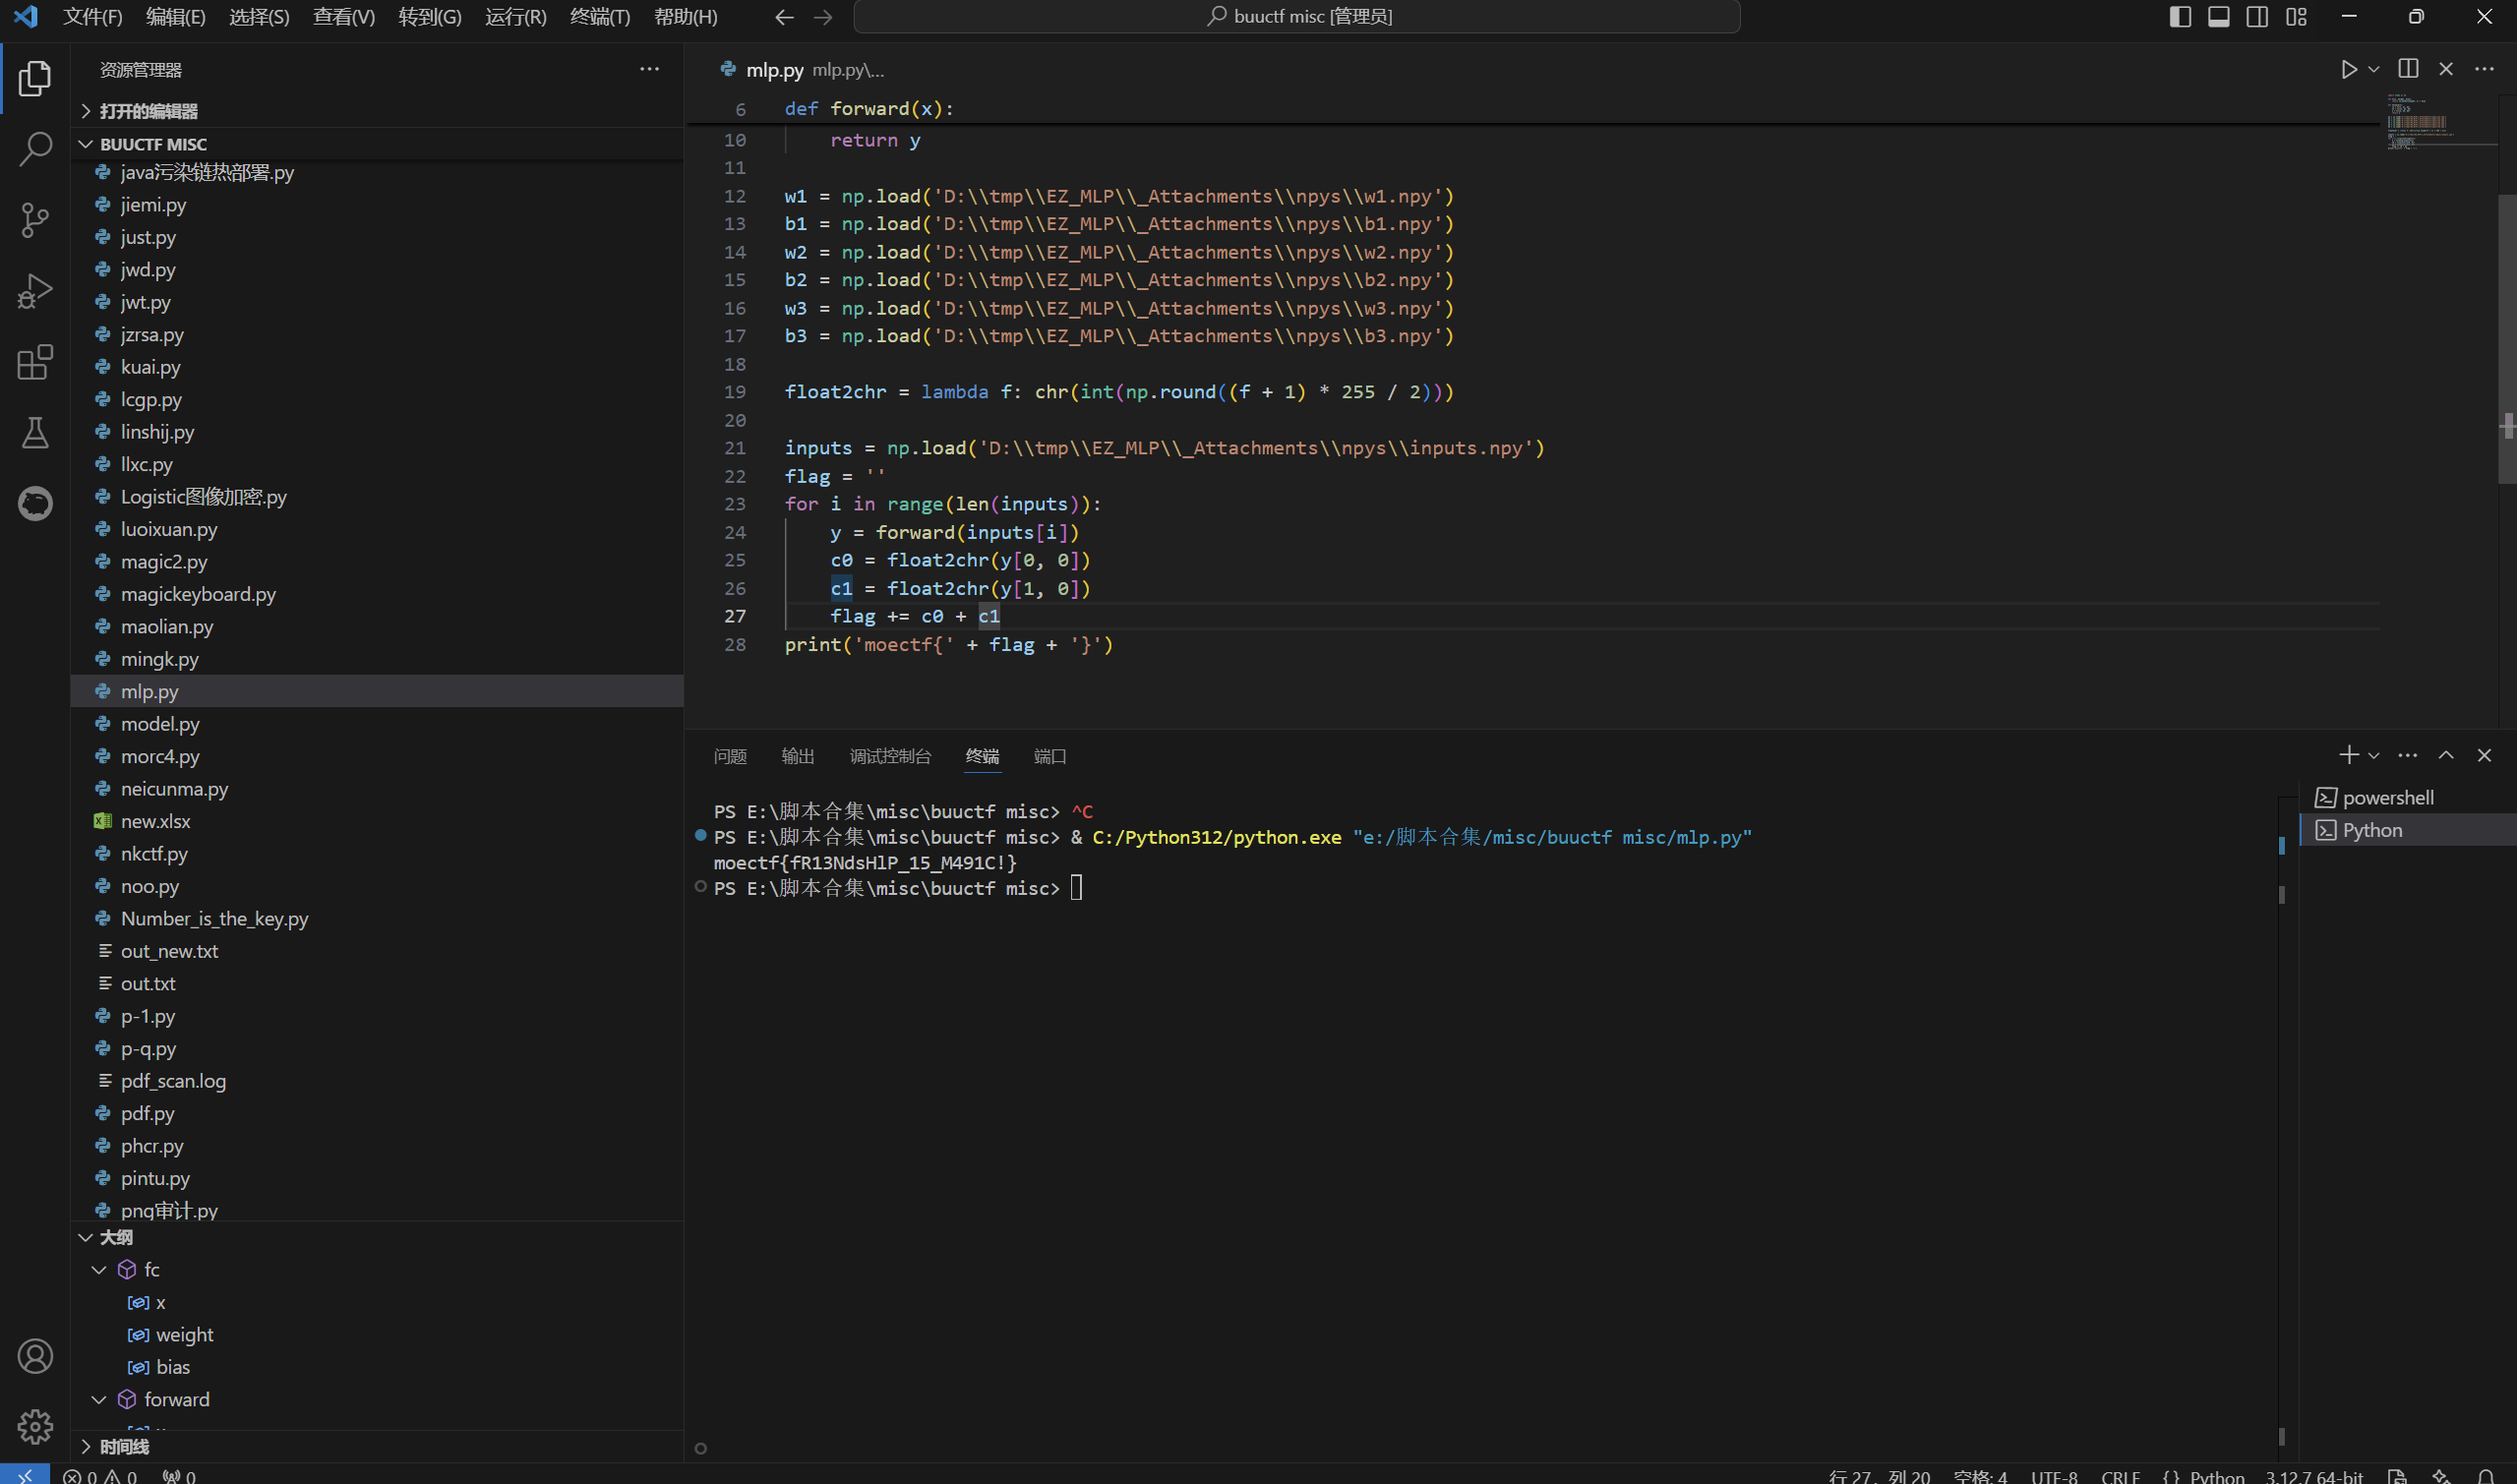
运行得到

最后flag为

1
moectf{fR13NdsHlP_15_M491C!}

Visual Hacker

题目描述:

1
为了避免接触性输入时留下生物特征,L.Inc在机密区域引进了一种新型密码输入系统: 使用者无需接触密码键盘,只需面对摄像头通过视觉眼动绘制字符来进行密码输入。 潜伏在L.Inc的内应最近成功骇入了几台输入用的拍摄设备,并提取出了公司员工进行密码输入时的大量关键帧。 内应在整理材料时已经将关键帧按照密钥的字符和顺序做好了分类排序,作为外部技术支持的你能够帮助内应深入L.Inc的机密区域吗?

Gaze Estimation模型,三维空间下的向量计算

exp:

1
2
3
4
5
6
7
8
9
10
11
12
13
14
15
16
17
18
19
20
21
22
23
24
25
26
27
28
29
30
31
32
33
34
35
36
37
38
39
40
41
42
43
44
45
46
47
48
49
50
51
52
53
54
55
56
57
58
59
60
61
62
63
64
65
66
67
68
69
70
71
72
73
74
75
76
77
78
79
80
81
82
83
84
85
# exp.py

from general_func import get_pitch_yaw, get_direction, get_intersection, InitModel, InitVar
from PIL import Image
import os
import numpy as np
import matplotlib.pyplot as plt


def ls(directory=None):
if directory:
try:
file_list = os.listdir(directory)
except FileNotFoundError:
return f"Error: '{directory}' not found."
except PermissionError:
return f"Error: Permission denied for '{directory}'."
else:
try:
file_list = os.listdir()
except PermissionError:
return "Error: Permission denied for current directory."

return file_list


def mkdir(directory_path):
try:
os.makedirs(directory_path)
print(f"Directory '{directory_path}' created successfully.")
except FileExistsError:
print(f"Directory '{directory_path}' already exists.")
except PermissionError:
print(f"Error: Permission denied for creating '{directory_path}'.")
except OSError as e:
print(f"Error: {e.strerror} - '{directory_path}'")


if __name__ == '__main__':

use_gpu = False
batch_size = 16
dir_rec_path = 'ExpTemp/direction_record/'

InitVar(use_gpu=use_gpu)
model = None
# Get direction record
mkdir(dir_rec_path)
for i in range(10):

if os.path.exists(dir_rec_path + str(i) + '.npy'):
continue

if model is None:
model = InitModel('checkpoint.pkl', use_gpu=use_gpu)

capture_dirs = ['Captures/' + str(i) + '/' + img_path for img_path in ls('Captures/' + str(i) + '/')]

direction_record = []
img_record = []
for capture_dir in capture_dirs:
img_record.append(Image.open(capture_dir))
if len(img_record) < batch_size and capture_dir != capture_dirs[-1]:
continue

pitch, yaw = get_pitch_yaw(img_record, model, use_gpu=use_gpu)
direction = list(get_direction(pitch, yaw))
direction_record.extend(direction)

img_record = []

direction_record = np.array(direction_record)
np.save(dir_rec_path + str(i) + '.npy', direction_record)

# Draw intersection points
mkdir('ExpTemp/fig/')
for i in range(10):
direction_record = list(np.load(dir_rec_path + str(i) + '.npy'))
points = [get_intersection([direction])[0] for direction in direction_record]
points = np.array(points)
plt.scatter(points[:,1], -points[:,0], s=200.0)
plt.savefig('ExpTemp/fig/' + str(i) + '.png')
plt.clf()

ABC

题目描述:

1
Code in My Matrix A∗B∗C

矩阵运算,二维码

exp:

1
2
3
4
5
6
7
8
9
10
11
12
13
14
15
16
17
18
from PIL import Image
import numpy as np

mat_A = np.load('D:\\tmp\\ABC\\_Attachment\\A.npy')
mat_B = np.load('D:\\tmp\\ABC\\_Attachment\\B.npy')
mat_C = np.load('D:\\tmp\\ABC\\_Attachment\\C.npy')

mat_A, mat_B, mat_C = np.matrix(mat_A), np.matrix(mat_B), np.matrix(mat_C)

expResult = np.array(mat_A * mat_B * mat_C)

qr_len = 29
im=Image.new("RGB",(qr_len,qr_len))
for i in range(qr_len):
for j in range(qr_len):
if expResult[j][i] > 0:
im.putpixel((j,i),(225,225,225))
im.save("D:\\tmp\\ABC\\_Attachment\\exp_out.png")

扫描二维码得到flag

最后flag为

1
moectf{U_C4n_D0_uR_AipH4_B_See_2023}

文章作者: yiqing
版权声明: 本博客所有文章除特別声明外,均采用 CC BY 4.0 许可协议。转载请注明来源 yiqing !
  目录